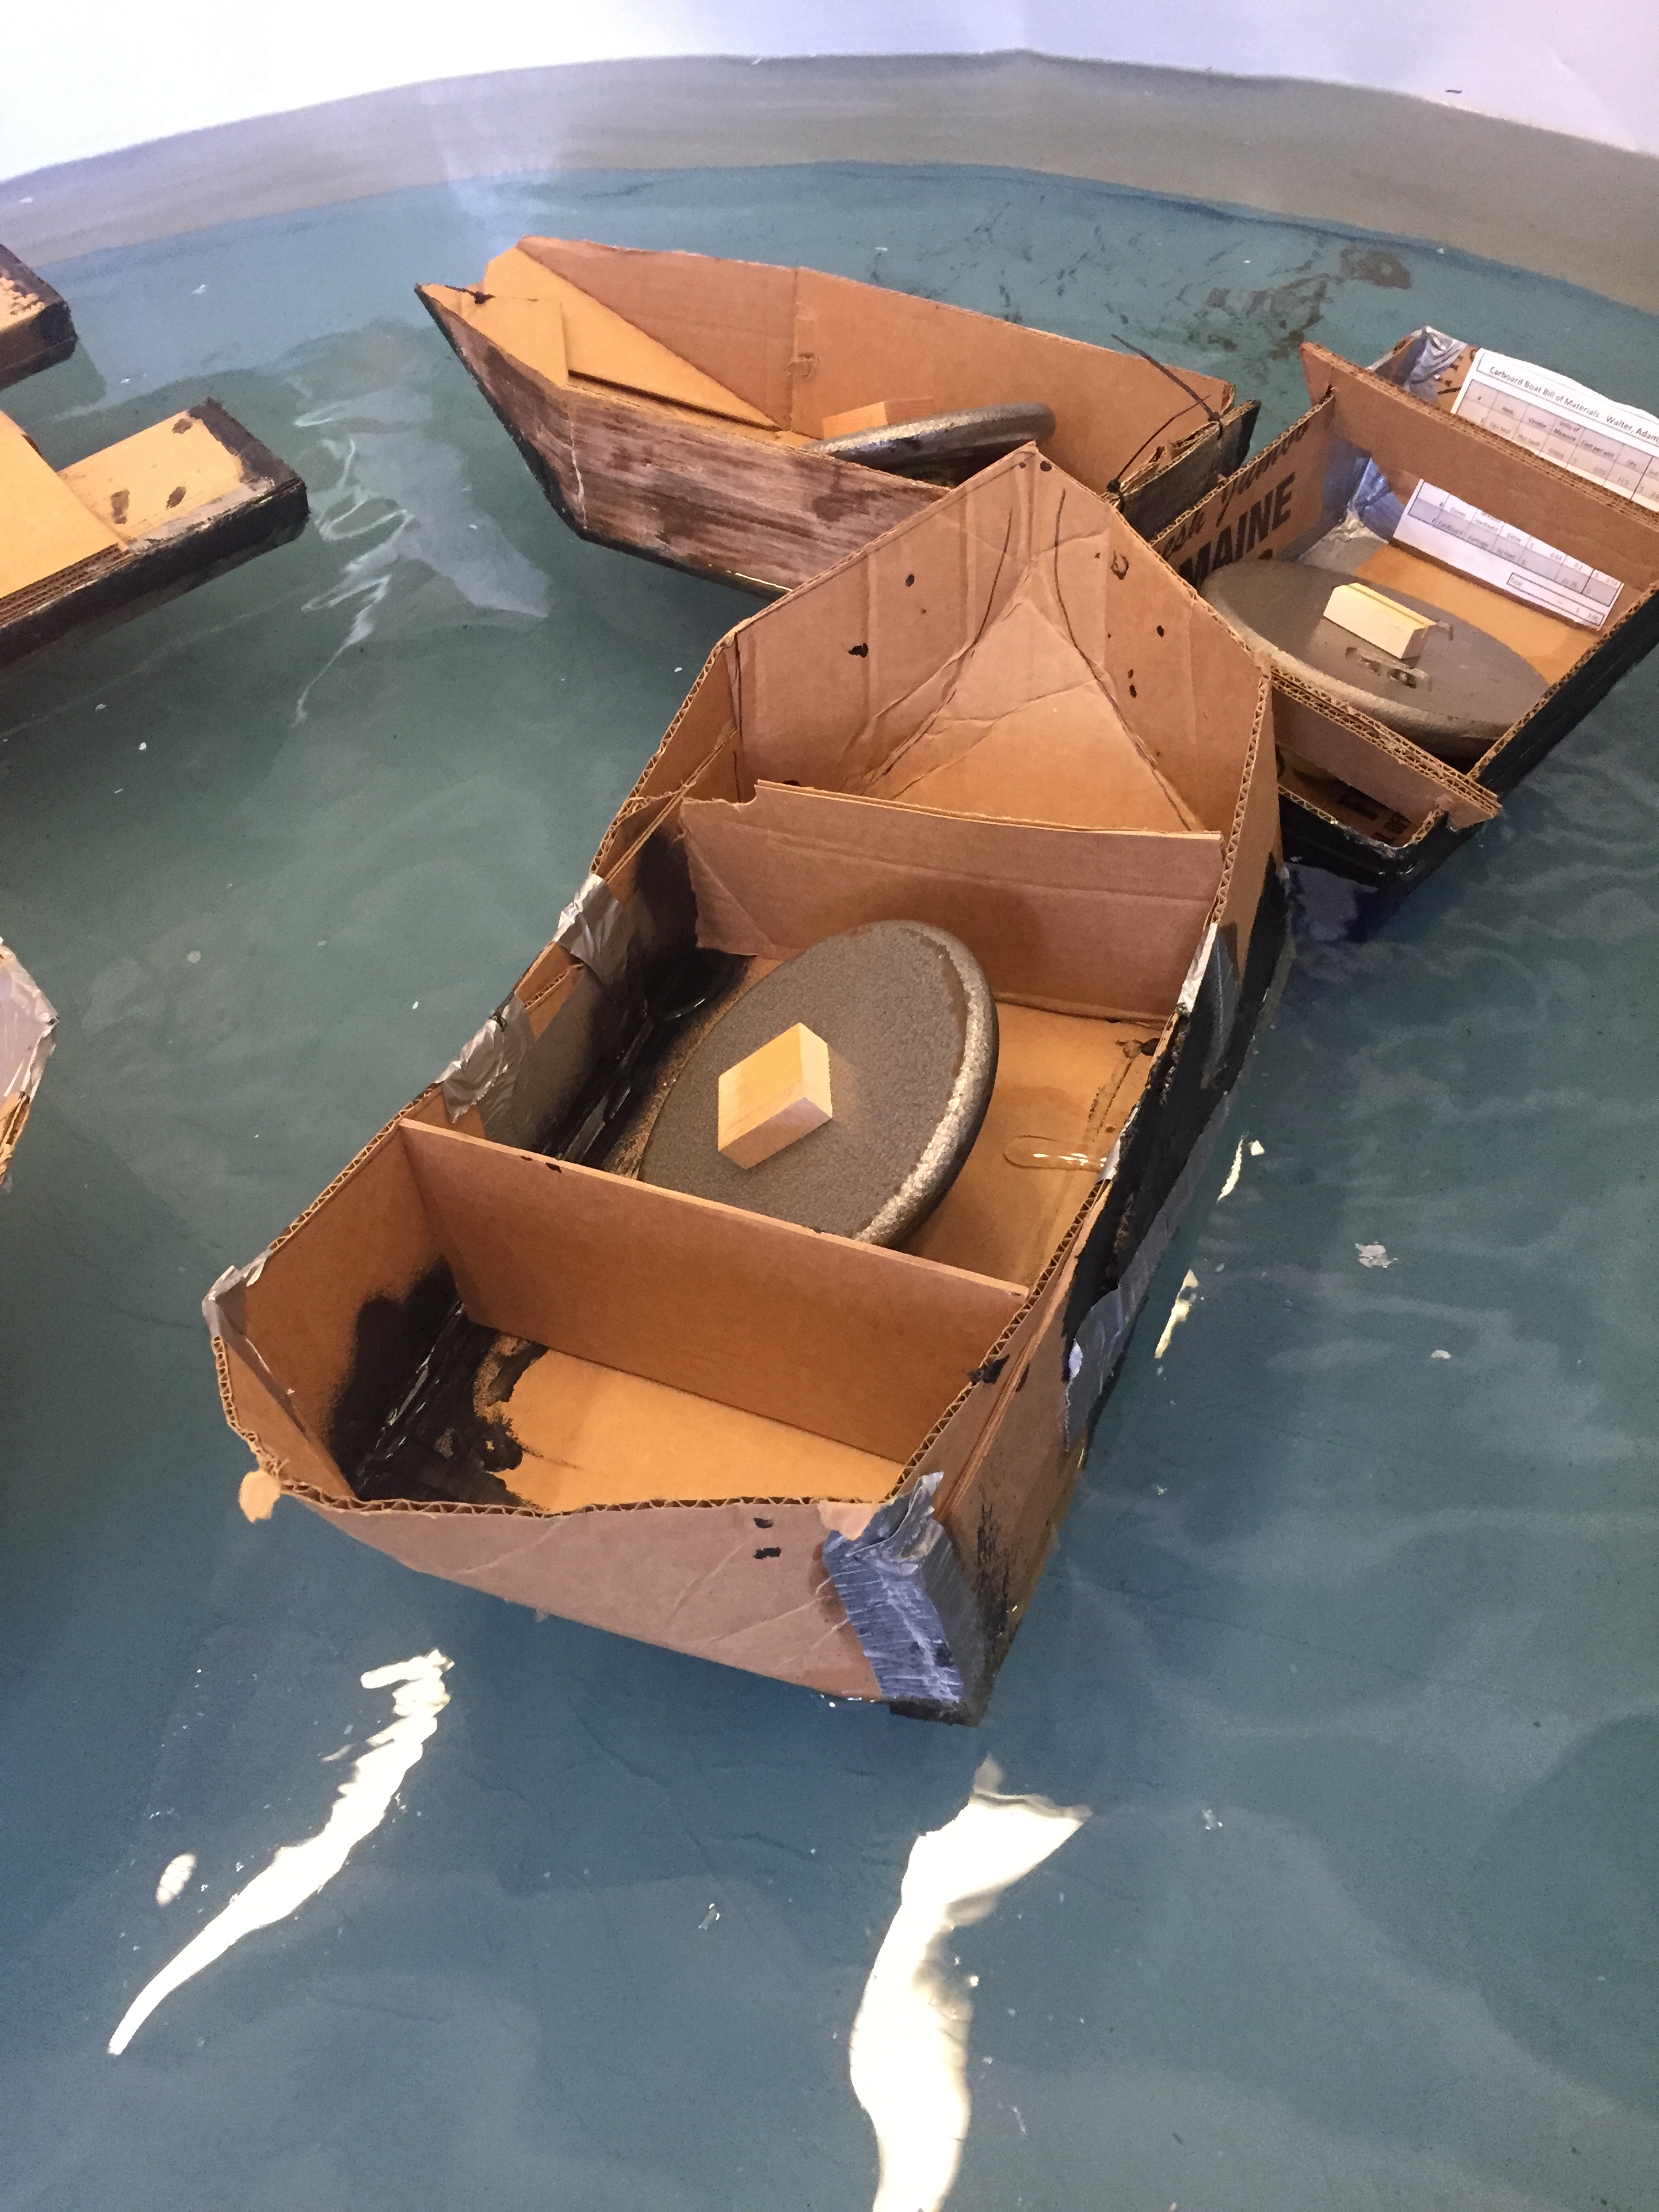
How did it turn out?
Well overall i think it went swimmingly. Our project met and surpassed all of the requirements of the project while coming out as an overall frontrunner in unassembled volume (1,251), mass producibility and float time. Had we been given an indefinite amount of time and no outside forced causing sinkage I believe our boat would have floated for hours. I do not currently have an exact data, charts graphs or pictures but the images in the post below show our craft woking and on Varvil’s big rankings board we came in at a cool 9th place, with a 45 out of 50. A solid effort and an A-.
Factor of safety, cost and deformation.
Our factor of safety was calculated at 4, a very good score that indicated good design and quality materials, or at least as quality as you can get with cardboard. Most elevators work at a factor of safety of 3 and most normal engineers prefer a factor of safety anywhere form 2.0-2.5 so our factor of safety which almost doubled that of the standard gave us some confidence in our product. Now on to cost, well cost for us was not huge factor but it was something that definitely had to be considered. Our overall bill of materials was $4.44, a pretty good overall cost considering the cost of all products used. (reference to bill of materials and image in previous post) We were able to keep this overall cost low by keeping our used resources low and using the cheaper resources instead of ones that would cost a lot i.e. using wax instead of flex seal. We also used duct tape on the seams where maybe we would have preferred to use flex seal, we did this to ensure our vessel would be cost effective while also being effective. Our zero-deformation factor of safety was calculated at I believe a 2, so what this means is that our overall factor of safety was high but this didn’t include how much our vessel would struggle, a lot. We used the standard equation to calculate factor of safety:
Factory of Safety [FS] = Actual Breaking Strength (lb)
Normal Working Load (lb)
Pr0ject Goalz
The goals of this project was to create a boat out of only cardboard and certain sealant products: Wax, FlexSeal, tape and glue that could support 150lbs and make its way along a pool. This project was a hypothetical idea to be used as rescue vessels for tsunami stricken nations. However, that was just a ruse for the REAL project goal, understanding and being able to effectively execute the engineering design process. This project was a lesson is designing, prototyping, editing design and the execution of a fully functioning product.
The beautiful piece of art that is the engineering design process.
The engineering design process step 11
In this step we evaluated and assessed our project. Basically we launched our boats in the pool and saw if they would float or sink. The results were good, despite taking on a small amount of water in the beginning due to a small cave in our boat stayed competently dry and floated until it was sunk with permission by a 3rd party who had also completed the constraint.
Our boat on the way to the wall to complete the design challenge. Coasting to the finish…….
Working hard on our way to success. myself paddling our boat to the wall to complete our goal.
Our brave vessel after it was sunk……RIP the USS B. Vavril
The engineering design process step 10
In this process we transferred a lot our plans from our manila to the big cardboard and we began to build, we folded our cardboard and bean to waterproof with Flex Seal, Wax and duct tape.
In this image we had just begin to fold our cardboard. As you can see we are using masking tape to keep the folds in place and we have our design drawn on our boat in sharpie.
Our finished, unsealed boat with the basic shape completed. We used zip ties to keep and shape.
In this picture we have the bottom of the boat sealed with wax and Flex Seal and the inside of the seam of the boat is sealed with tape and wax.
In this image our boat is essentially finished. We added risers to the walls to prevent water from flowing over our walls and into the boat, sinking it.
This is our boat when the assembled volume is being taken, as you can see the boat breaks down to essentially flat.
The engineering design process step 9
In this step we received our 8 x 4 piece of cardboard and transferred and refined our design from our small piece of cardboard to the full sized piece. We used our scale piece of manila to sketch a design and wrote our design on our large piece then began our process of building. 
Our blueprint for our full sized boat drawn on our small manila folder
The engineering design process step 8
In this process we tested and evaluated our prototype on its performance in the project. Our prototype had to support a 10 pound weight attached to a tennis ball (which simulated the instability of the average person) for as much time as possible. We launched out legendary craft at approx. 11:14 and it remained afloat until 11:20 when the bell rang and hopefully long after, although I didn’t stick around to be sure.
Our amazing craft the USS B-Varv is a trooper/destroyer of other boats.
The engineering design process 7.5 (the redesign)
Much to my chagrin the day of the assessment my group decided to change from the original prototype posted below to a “better” prototype that would be able to fold down.
This hastily made version used the “double V-bow” design and was sealed using a mixture of wax, flex-seal and duct-tape. The bill of materials was only 39 cents so the resources used was relatively low.
The engineering design process step 7
In this step we created a proto-type of our design and test it using a 10 pound weight and a small pool.
Due to foolishly misunderstanding our time constraints for the prototype it works very well but will 100% not break down very well. It did however hold a 10 pound weight for approx 17 minutes before starting to take on minute amounts of water. I believe with better sealant such as flex seal our design could possible float forever.